A wet/dry vacuum solved my Dreame L50 Ultra's hairball problem
My Dreame L50 Ultra (affiliate link) could pick up dog hair, but its dock struggled to get the dense wads of hair out of the robot and into the bag. I made an adapter so an external wet/dry vacuum could do the emptying instead, with Home Assistant handling the switching. The project is finished and in use, and I haven’t had a hairball since!
I directed the project and supplied the measurements and physical fit-test feedback. Codex did the CAD implementation and Home Assistant automation work, and helped draft this post. The printed parts and physical tests were my side of the collaboration.
The replacement bags annoyed me too. Bags like these on Amazon (affiliate link) were about fifty cents to a dollar each. Getting them cheaper on AliExpress is an option, but it still sucks when a hairball gets stuck and the bag is only half full. Throwing away a half-full disposable bag means more waste going to landfill, on top of paying for capacity I wasn’t getting to use. Cheaper bags wouldn’t fix the dock’s inability to get the hair into them.
I also looked at this reusable dust-bin design on MakerWorld. I didn’t think it would be enough for my setup: the bins were small, and replacing the bag with a rigid container wouldn’t address the hairballs clogging the evacuation path. The design also calls for cutting up a vacuum bag and using its filter material in the printed bin, so it still means sacrificing a bag for filtration.
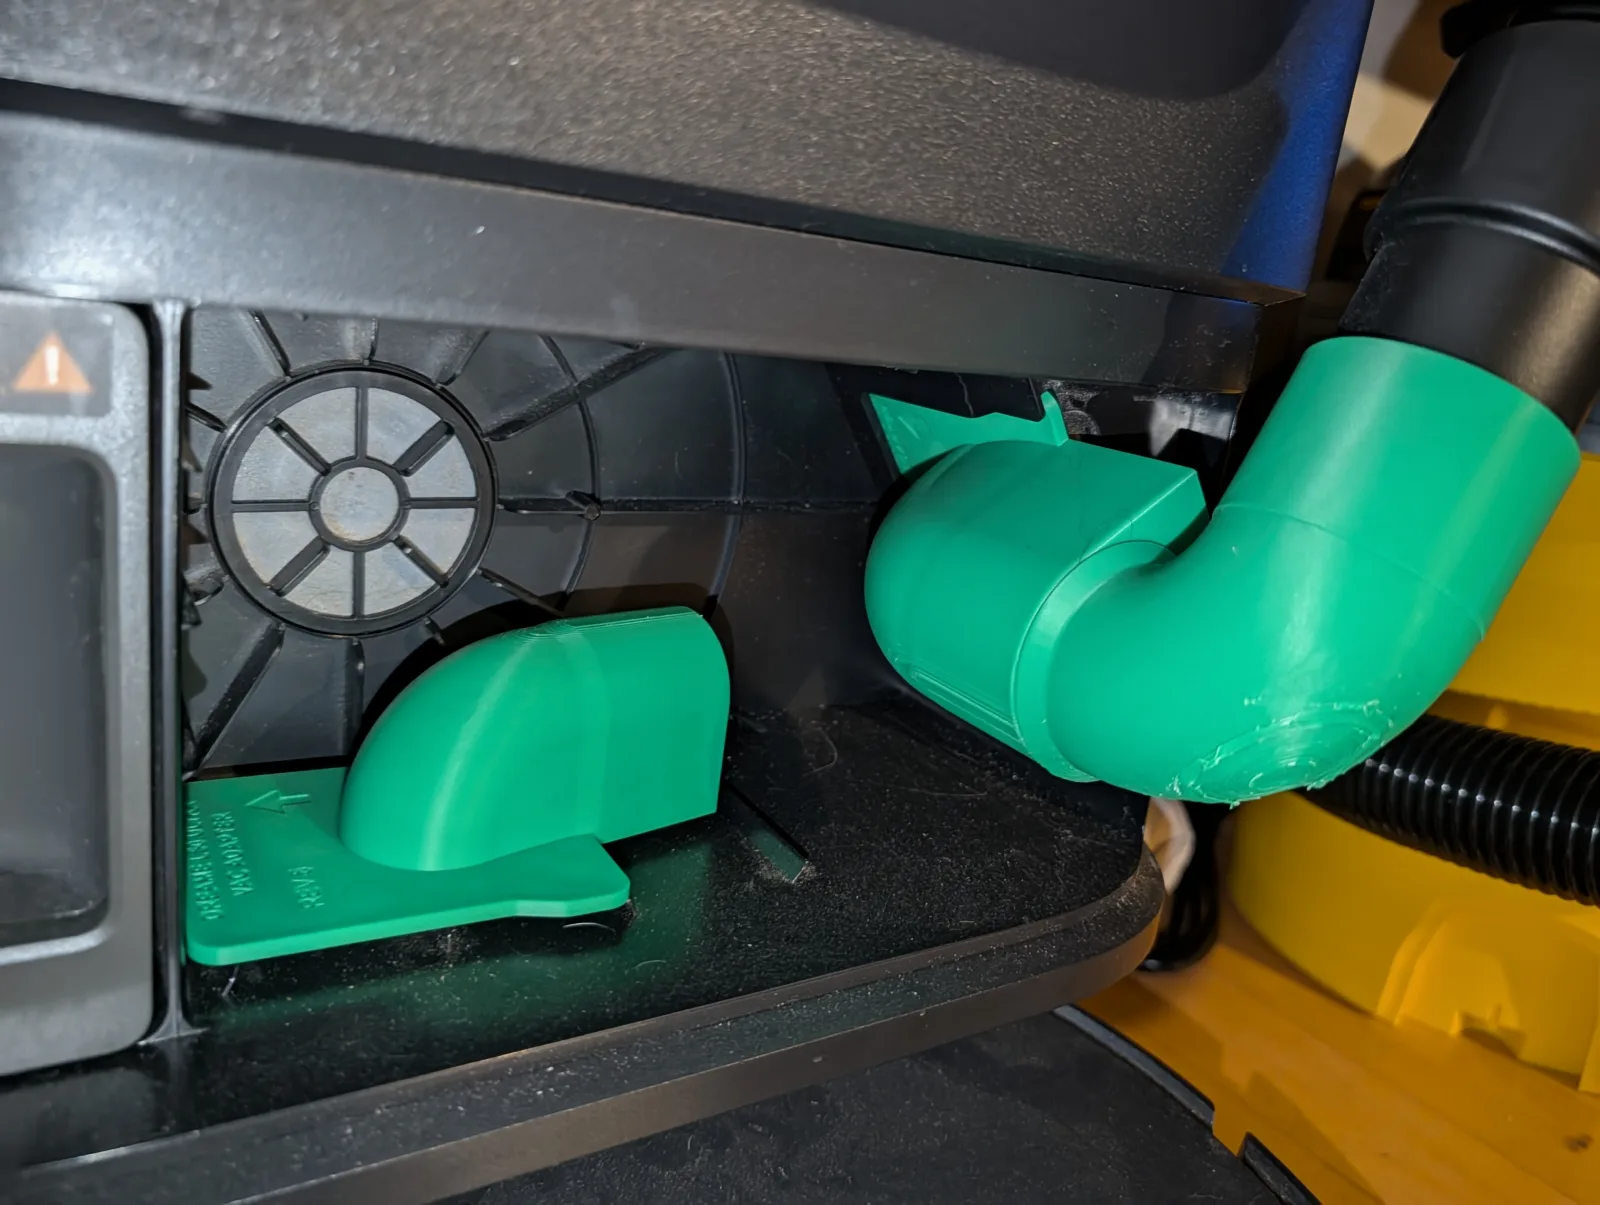
The printed dock adapter and separate elbow. The CAD versions for both wet/dry vacuums are shown below.
We had two wet/dry vacuums available: a Stanley SL18129 and a DeWalt DXV05P-QT (affiliate link). Their hoses have different connectors, so Codex made a version for each. The quieter DeWalt is the one I use now. The project repository has the editable build123d source and downloadable STL and STEP models.
Keeping the dock intact
The robot and dock stay intact. The robot empties through the dock’s existing evacuation path, then a printed adapter routes that path into a short hose connected to the wet/dry vacuum. I wanted a removable part at the bag interface, rather than cutting a hole in the dock and discovering afterward that I’d misunderstood the airflow.
The design involved more than making two holes line up. The dock detects whether a bag is present, and the adapter had to sit properly in its slot, keep a seal, leave room for the hose, and remain removable. The robot’s small bin, flaps and seals also mattered when considering the external vacuum’s suction.
The MakerWorld bin was useful as a starting reference, though. We took measurements of its inlet hole and mating interface, recreated that geometry in build123d, then fine-tuned my adapter through measurements and fit tests to meet my needs. That gave us somewhere to start with the dock connection; the hose routing and vacuum-specific connectors grew from there.
Codex did the parametric CAD implementation. The editable model records the dimensions and clearances, so changing a hose measurement doesn’t mean starting the whole part over. I could print small fit-test pieces before committing to a larger adapter with an elbow attached.
Two vacuums, two versions
The dock interface is shared, but the hose side changes. Each version has two pieces: the card adapter that slides into the dock’s bag slot, with its first bend, and a separate plug-in 90-degree elbow to turn the hose connection downward. Making the second bend removable let us change that routing without reprinting the whole card adapter.
The Stanley version started from a roughly 30.75 mm hose connector. A separate tapered socket coupon fitted that connector well. The first dock card could wiggle out; later revisions changed the trailing outline, and the third version fitted much better. Those small test pieces answered fit questions before I committed to larger prints.
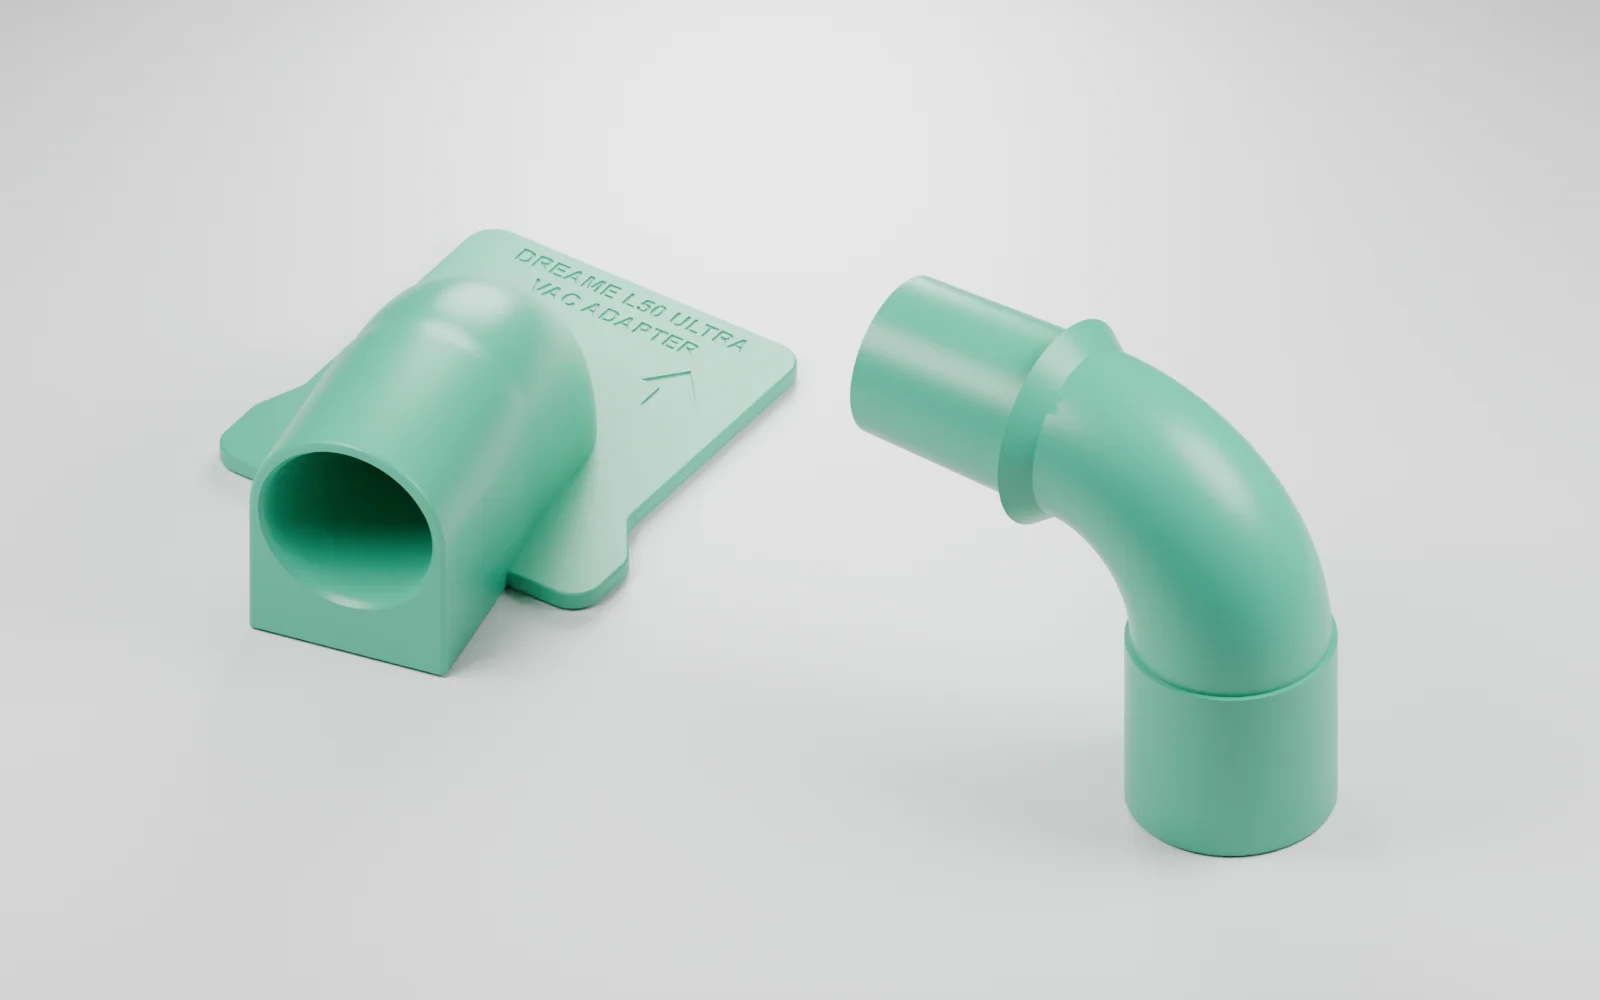
Stanley SL18129: the REV 5 dock adapter and matching Stanley-to-Stanley elbow, rendered from the actual CAD meshes. The pieces are separated for visibility.
I switched from the Stanley to the newer DeWalt because it was quieter. That meant measuring a different hose connector and making another version of the adapter. Its cuff measured 44.77 mm at the tip and 45.77 mm at the wider end over 62.24 mm. Codex used that taper for the portion inserted into the socket, with clearance added explicitly, and enlarged the bend for the bigger connector. A nominal hose size wasn’t enough to design the actual mating surface.
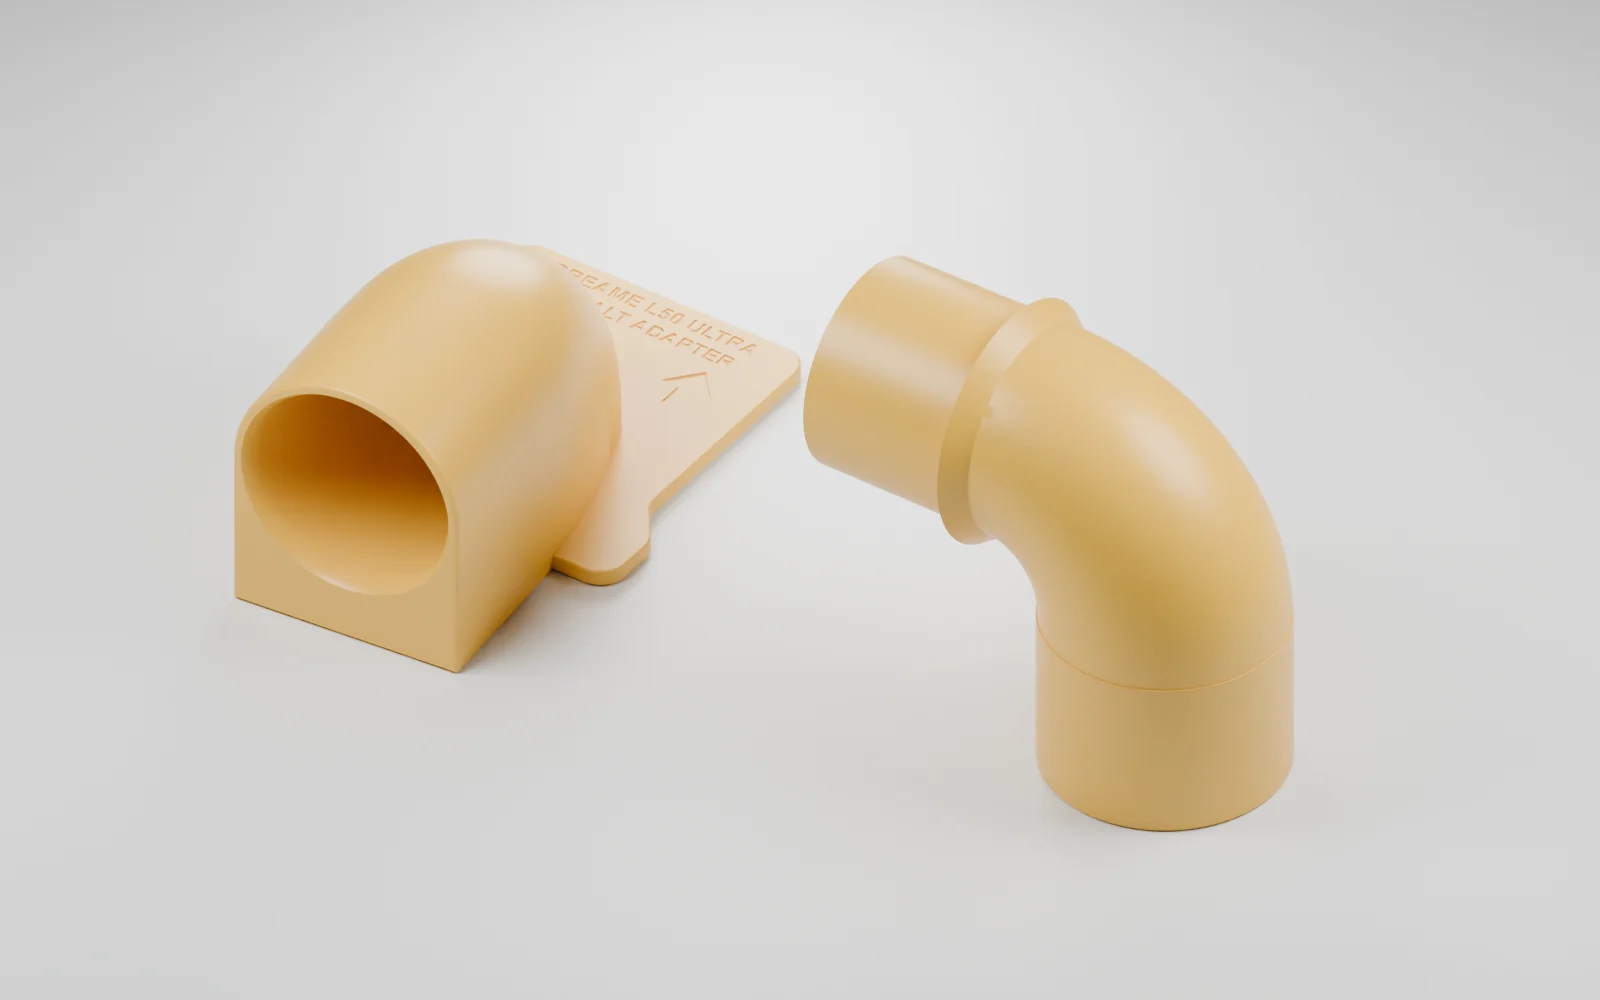
DeWalt DXV05P-QT: the measured-cuff REV 5 adapter and matching DeWalt-to-DeWalt elbow. These are CAD renders, not photos of printed parts.
There is also a Stanley-to-DeWalt elbow in the source. Having both vacuums meant this became a small family of related models, rather than one fixed hose size. The CAD checks confirm valid solids and clearance between the matching parts, and the finished DeWalt setup is now doing the job in practice.
Switching the motor with Home Assistant
The smart plug is a Sonoff S31 running ESPHome, repurposed from another job. Codex configured it and the Home Assistant automation to switch the wet/dry vacuum around the Dreame’s auto-empty cycle. The S31 exposes power measurements as well as relay control.
An early end-to-end test confirmed the robot could clean, return, report its emptying state, and produce the expected relay on/off sequence. The relay stayed on for about 46 seconds in that test. That was an early check of the automation and switch states, before testing the complete airflow path.
This uses the Dreame Home Assistant integration I worked on to follow the robot’s status.
The timing changed during development. The configuration follows the dedicated auto-empty status: wait six seconds after it becomes active, check that it’s still active, then turn the relay on. When emptying becomes idle, turn it off.
The two-minute cutoff runs in ESPHome on the S31 itself. If Home Assistant or Wi-Fi drops out, the plug can still turn the vacuum off locally. It also boots with its relay off, so a reboot won’t restart the motor. Those behaviors live on the switch, alongside the normal Home Assistant control.
Only after starting this project did I learn that people also use wet/dry vacuums with relays for trapping rats! I came across Shawn Woods testing a vacuum rat trap. That was a use for this combination I hadn’t expected. It wasn’t where my idea came from, but it was interesting to discover another application for switching a vacuum on in response to a trigger.
I’m happy with how this turned out. The adapter handles the airflow path, Home Assistant handles the motor timing, and I haven’t had a hairball since putting it into use. The quieter DeWalt also made it easier to live with. This solved the annoyance I set out to fix.
If you have a similar problem, the source and model files should give you a starting point. The useful part of keeping it parametric is that a different hose can become another variant, using its actual measurements.
Known issue: the bag-change reminder
The Dreame still periodically refuses to auto-empty and tells me to change the bag. Its bag-change reminder is based on an interval, rather than a sensor measuring how full the bag actually is. That’s separate from checking whether a bag is present in the dock.
With this setup, I disregard the bag-change message itself: there isn’t a dock bag to replace. The reminder can still interrupt auto-emptying, but it doesn’t mean a bag has filled up or that the adapter has developed another hairball.